Week 3 CSA Veggie Haul
The Fresh Flavour Haul
Week 3 started with pulling out the lettuce, arugula and broccoli. They were starting to bolt, and as a result the flavour turns bitter. So where the arugula was we seeded carrots for September. The row that had broccoli and lettuce, is now broccoli and cauliflower for the September CSA boxes.


* Pulling Arugula * Planting carrots after the arugula came outFertilize and Water
As I took care of that, Gemma went around with a hand pump sprayer and fertilized 90% of the vegetables. Some vegetables, like the kale do not need to be fertilized. This gives them a boost going into the summer.
It has proceeded to rain the last two days which I am thrilled about. The plants respond really well to soft water from the rain. This also means less driving to go water in the mornings. Wins all around.
You may have noticed that our tomatoes, cucumbers, squash, and peppers are all planted with black plastic surrounding it. This plastic helps suppress weeds and keeps the ground moist. There is drip tape under the plastic to allow watering. I knew in theory that the plastic would keep in moisture but had never experienced it yet. I watered on a Sunday, then left it for 4 days in 25 degree weather. I checked under the plastic and a couple inches down there was moisture. It works well.


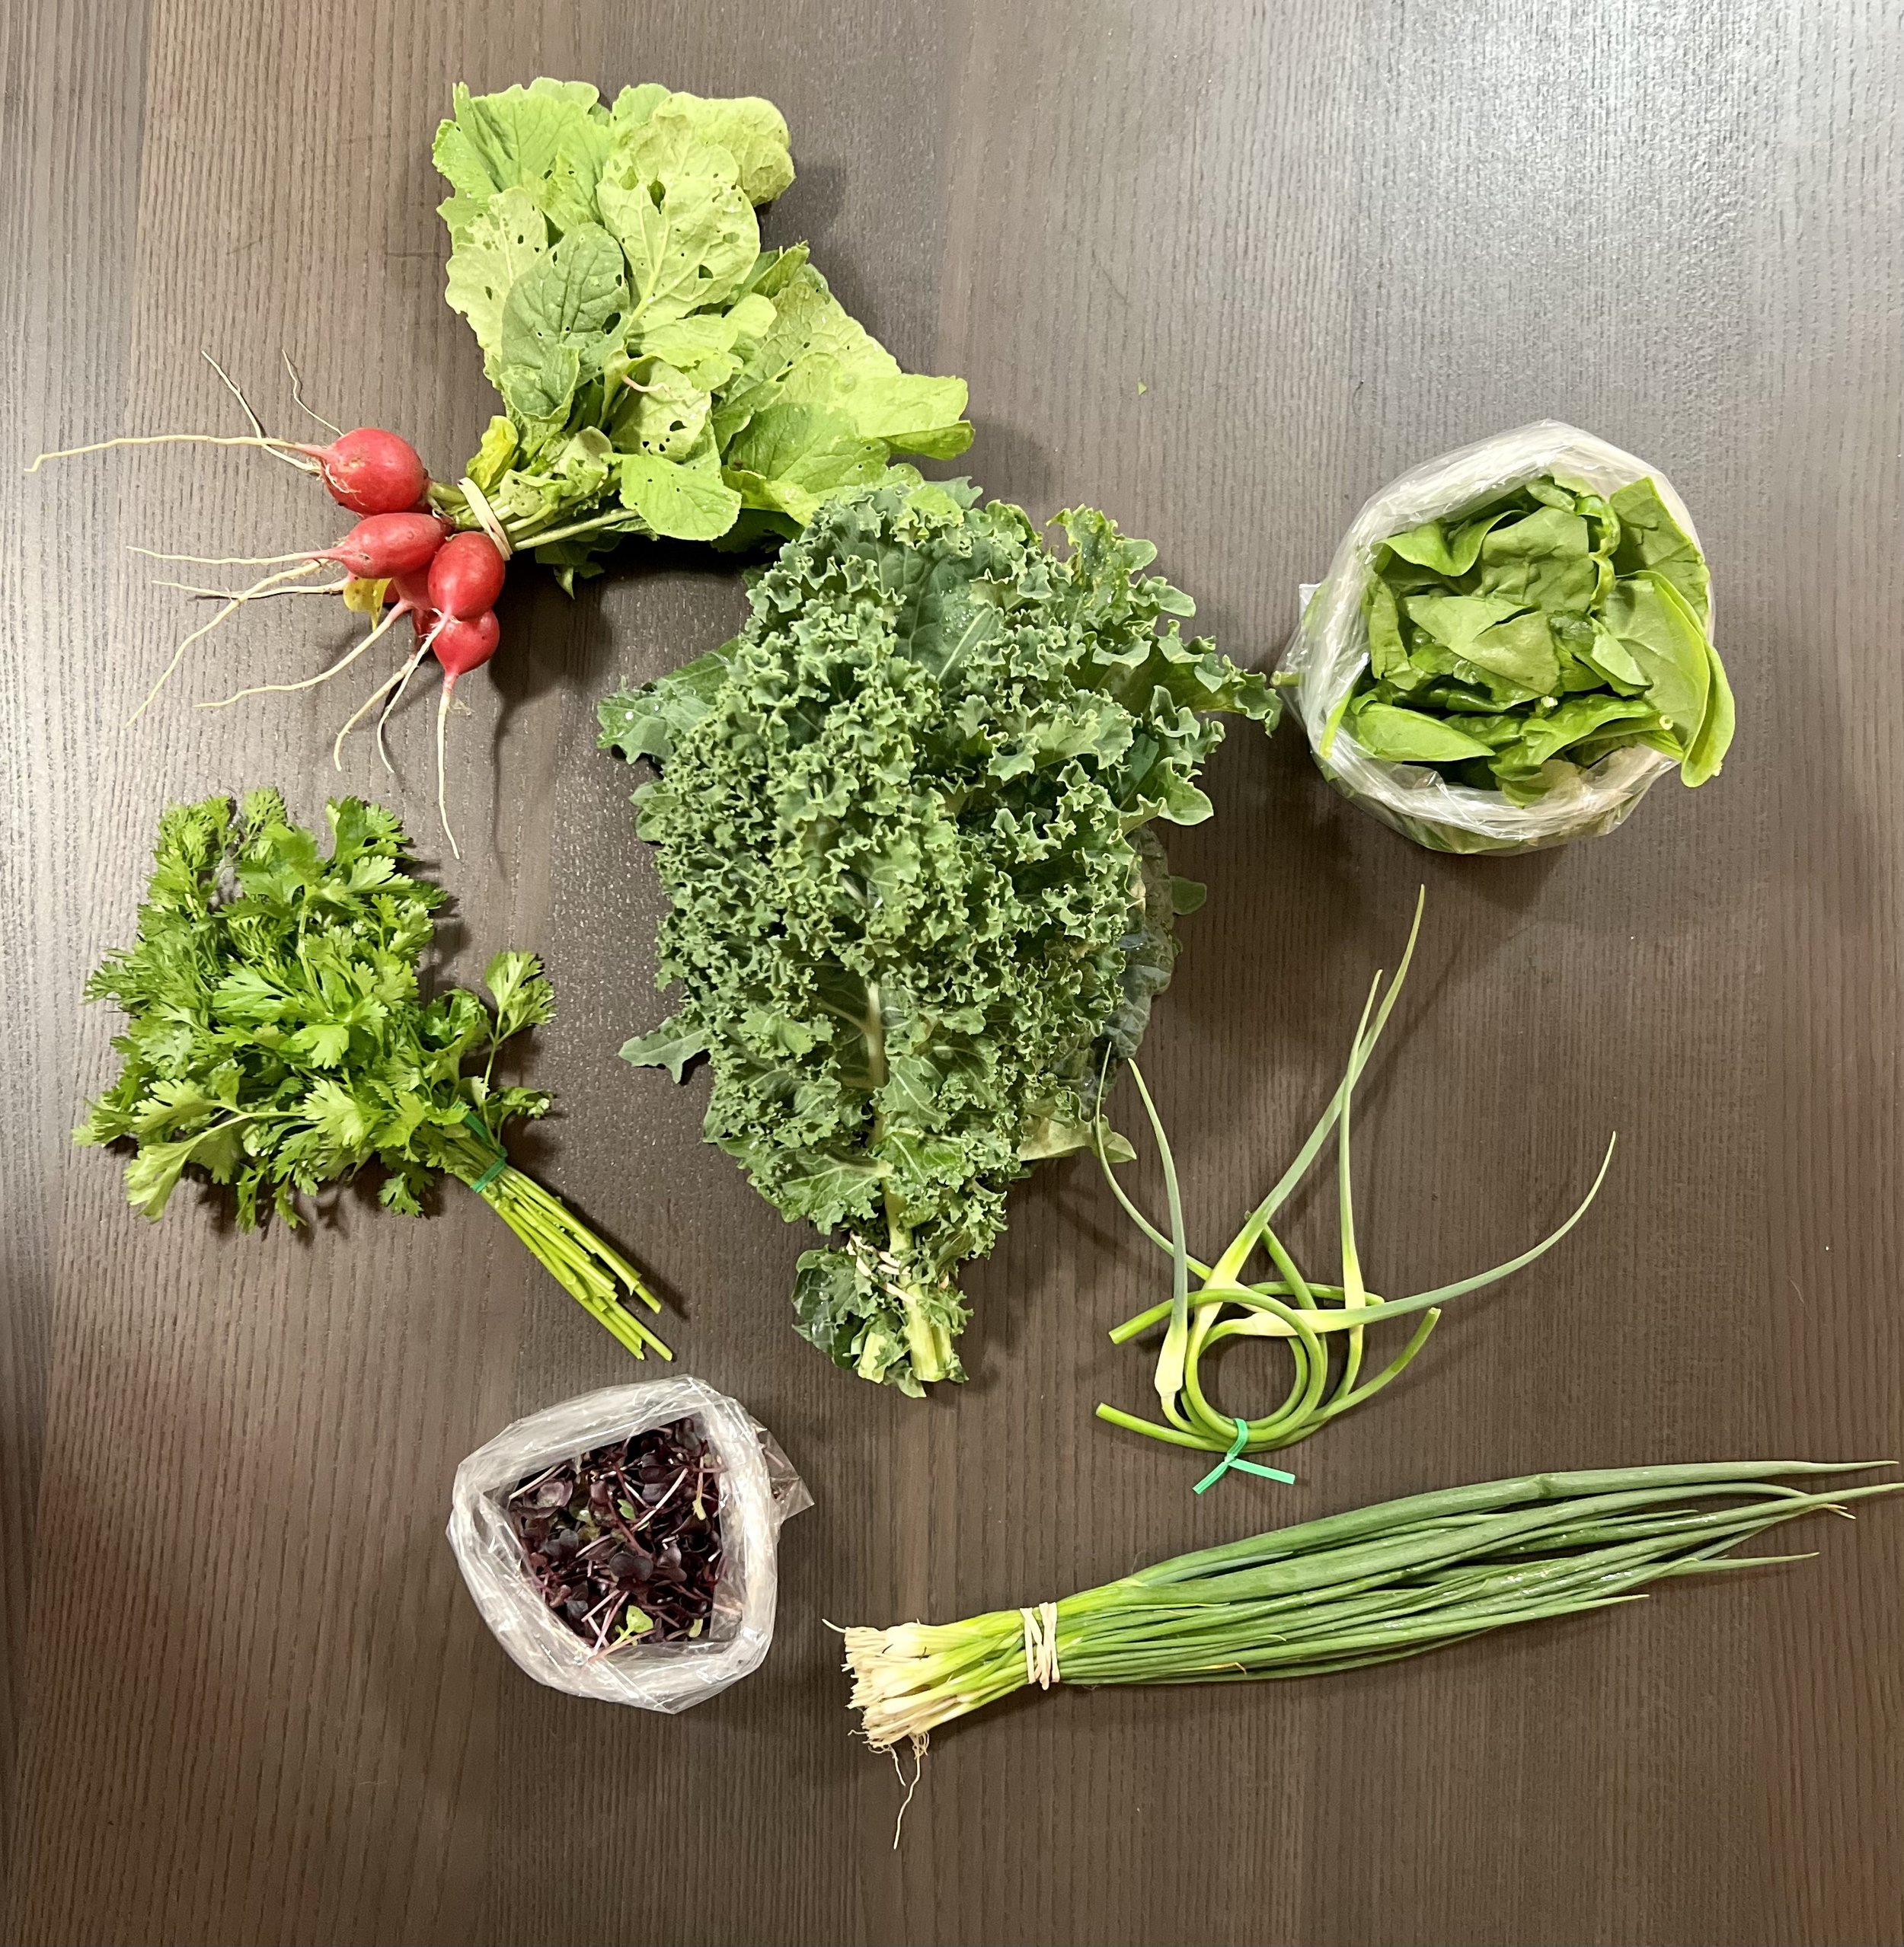
*Black plastic covering the rowsWhat’s In The Haul
Spinach
Kale
Radishes
Garlic Scapes
Radish Microgreens
Green Onion
Cilantro
Week Three Recipes

SPINACH
Spinach & Artichoke Pasta
About Spinach:
Spinach can replace salad greens in your everyday life and goes great in smoothies.
Spinach Storage Tips:
In a resealable bag or container. Place the spinach and on one side put a piece of paper towel and seal the bag or container. The container works great cause it prevents the spinach from getting bruised in the fridge. This will last in your fridge up to 10 days.
Spinach Artichoke Pasta
5 oz of spinach, roughly chopped
4 tbsp butter or cooking oil
1 onion, diced
3 cloves of garlic, crushed
2 cans of artichokes
4oz cream cheese, room temperature
4oz sour cream
1/2 cup parmesan cheese
16oz box of Pasta of your choice
Salt and Pepper
In a large pan over medium high heat, add the butter, chopped onions and crushed garlic. Let it cook for 2-3 minutes, then add in the chopped spinach and let cook for an additional 2 minutes. The spinach will wilt down. Next drain the liquid from the two cans of artichokes and chop them into tiny pieces. Add the artichokes to the pan of spinach and onion and cook until the artichokes are heated through. Reduce the heat to medium. Cut the cream cheese into small pieces and add to the pan along with the sour cream. Stir the cream cheese continuously to prevent it from burning. Once the sauce is smooth add in the parmesan cheese, salt and pepper. In a separate pot of water prepare your pasta. Once the pasta is at your desired doneness, pour 1/2 cup of the cooking water into the sauce and stir to combine. Strain the rest of the pasta and add it to the sauce.
*If your want to add protein to your pasta, add it at the beginning of the cooking process before you add the onions and garlic.

KALE
Kale Chips
About Kale:
A hearty green leafy cruciferous vegetable that is highly rich in nutrients. The 3 kinds we give out are curly, Dino, and red Russian.
Kale Storage Tips:
Take the washed kale and place in a zip lock bag or air tight container. Put a dry piece of paper towel in the bag or container to wick away any moisture. Kale is pretty resilient and will last in your fridge up to 10 days.
FREEZING KALE: Remove the rib from the kale leaf. Blanch the kale in boiling water for 1 minute. Remove the kale from the water, letting it air dry or dry it off with a dry towel. Place it on a baking sheet and put into the freezer for 2 hours. Once frozen put into a zip lock bag and put it back into the freezer. It will last up to 3 months.
Blanching is the process par cooking (cooking something half way). It starts with boiling water and adding the vegetable to the water and cooking for a certain amount of time depending on the vegetable density. Then removed from the water, strained, and put into an ice bath. The ice bath shocks the vegetable and stops the cooking process.
Kale Chips
1 bundle of kale
1 tbsp olive oil
Salt to season
Pre heat the oven to 300 degrees Fahrenheit. De-stem the Kale and cut into bit size pieces. Thoroughly pat dry the kale with paper towel. Next add the kale to a bowl with the olive oil and mix until evenly coated. Lay the kale out on the baking sheet spaced apart, making sure none of the pieces are touching. Sprinkle with salt and put in the oven for 10 minutes. When 10 minutes is up rotate the pan and continue to bake for another 15 minutes. Remove from the oven and let cool slightly. Kale chips are best enjoyed slightly warm.

RADISHES
Pickled Radish
Radish, Apple & Cilantro Salad
Radish Storage Tips:
On the counter: using a mason or jam jar. Or resealable container. Place the radish bulbs in the jar with the tops sticking out. Pour water into the jar covering the radish bulbs, making sure to leave the greens dry. They will last on the counter like up to 4 days.
Pickled Radish
Bundle of radish
1/2 cup apple cider vinegar
1 tbsp sugar
1 tsp salt
1 cup hot water
Cut both ends of the radish off. Thinly slice the radish into coins (thiner the slices the better the radishes will pickle). In a small pot of water add the water, vinegar, salt and sugar and bring to a simmer. Once the salt and sugar have dissolved, pour into a bowl with the radishes and let sit out on the counter for an hour. Then put into a resealable container and put in the fridge. It will stay good for up to 3 weeks.
Radish, Apple & Cilantro Salad
Vegetable Slaw:
Bundle of radishes
1 Apple of your choice
4 Green onions
1/2 cup cilantro
Salt and Pepper to taste
Dressing:
1/4 cup olive oil
Juice from a lime
1 tbsp honey
1 tsp dijon mustard
Trim the tops and bottoms from the radishes. Thinly slice the radish, apple and green onions and add to a bowl. Next roughly chop the cilantro and to the slaw mixture. In a bowl combine all the dressing ingredients with a whisk and pour over the vegetables. Finish off with Salt and Pepper to taste.

GARLIC SCAPES
Scape and Lemon Compound Butter
About Garlic Scapes:
A scape is the flowering part of the garlic plant. In order to get bigger bulbs, the scapes are removed. So the plant puts more energy into the bulb and not into a flower.
I was confused when I got scapes in my first ever CSA box. Think a garlic green onion. Goes great with salads, eggs, tuna. Or the following recipe is pretty good as well.
Garlic Scape Storage Tips:
Garlic scapes will store well in a plastic bag in the fridge, and will last up to 3 weeks.
Freezing garlic scapes, blanch the scapes in boiling water for 2 minutes. Remove the scapes and put them into the ice water to stop the cooking process. Lay the scapes out on a baking sheet and put into the freezer for 3 hours. Take the frozen garlic scapes, put into a freezer bag and put back into the freezer.
Scape & Lemon Compound Butter
1 bundle of garlic scapes
Juice and zest of 1 lemon
1/2 cup soft butter
Salt and Pepper
In a food processor add all the ingredients and blend together. With a rubber spatula scrape the butter mixture out and onto a piece of plastic wrap. Form the butter mixture into a rough log shape and wrap the plastic wrap around shaping the butter. Twist the ends of the plastic wrap to tighten the package. Place in the freezer to keep. When you want to use the compound butter remove from the freezer 10 minutes before using. Slice a coin off the butter and serve over grilled meat or potatoes.

RADISH MICROGREENS
Put that Shit on Everything!!!
About Radish Microgreens:
Radish Micro-Greens, are on the bitter side. They pair well in salads and sandwiches, I would not use it in a smoothie. Microgreens are a fast convenient, highly nutritious food that can be worked into sandwiches, wraps, salads and added to food for a fast and easy way of getting fresh greens.
Radish Microgreen Storage Tips:
The greens will store in the bag it’s self for up to a week. To add extra length to the life of your micro-greens. Put the greens between two layers of paper towel and put into a plastic bag or resealable container. This will store up to 10 days in the fridge.

GREEN ONION
A tasty summertime add on to almost every dish.
Green Onion Storage Tips:
Cut off the roots of the green onion, then put in a ziplock bag with a piece of paper towel and put in the fridge. They will store in the fridge for up to a week.
I like to add green onions, to a fresh summer time salad. Whether it is pasta, potato, or greens salad.

CILANTRO
-Guacamole
Herb Storage Tips
Break up herbs into to categories, tender herbs and Harty herbs.
Tender herbs are as follows basil, cilantro, mint, dill, and tarragon. These herbs spoil quickly and should be used 5 days after getting. The best way to store them is in a mason jar or glass of water with the stock sitting in the water. Much like fresh cut flowers.
Harty herbs such as thyme, rosemary, sweet marjoram and sage are much more forgiving. Tie the bundle of herbs into a boutique and store in the fridge for 7-10 days.
Guacamole
3 ripe avocados
1/2 red onion, finely diced
1 garlic clove, crushed
Juice from 2 limes
1/2 jalapeno, finely diced (optional)
1/4 cup cilantro, roughly chopped
Salt
Peel and pit the avocado, put the avocado in a bowl and mash with a fork. Add the red onion, garlic, lime juice, jalapeño, cilantro and salt. Mix everything thoroughly.
Guacamole, isn’t just good with chips or tacos. I will add it in the place of cheese in omelets.